
Install a Water Softener Yourself for Less by Following These EASY Steps. You may be surprised at how easy it really is!
Do you need help selecting the right size water softener? See my article, How to Size a Water Softener.
These will be useful for installing most water softeners.
The usual components that come with water softeners:
| Control Valve with a Bypass valve | Large Funnel (for filling the tank with the Resin) |
| Upper Basket | The Salt water Brine Tank |
| Small Parts Bag for the Brine Tubing | Brine Line Tubing |
| AC Transformer/Adapter | Drain Line Tubing |
| Resin Tank w/internal Distributor Tube | Silicone lubrication packet |
Tools that you’ll need:
- Pipe Cutters
- Channel Lock Pliers
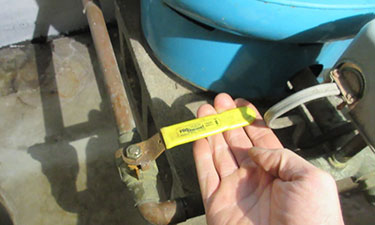
- Teflon Tape
- Tape Rule
- Masking Tape
- Rigid or flexible plumbing fittings
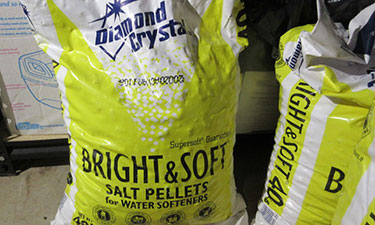
- (4) Bags of Water Softener Salt
Installation:
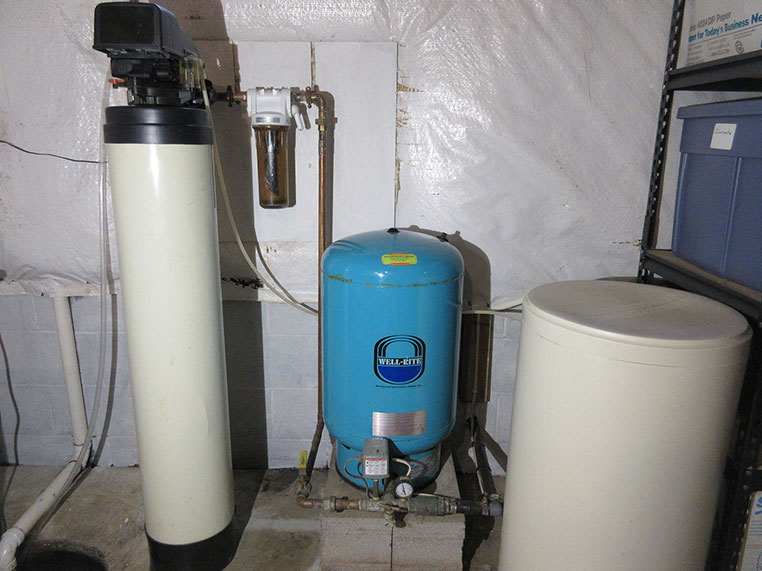
STEP 1.) Decide where you’ll be installing your new Softener. Place the tank near to where you’ll be installing it. If you have a well and a pressure/holding tank, you will need to install the Softener AFTER (downstream of) the pressure tank.
STEP 2.) Use the masking tape to tape off the opening of the Distributor tube. That’s the tube that runs down the center of the tank. This will keep the Resin beads from pouring into the tube.
Insert the Distribution Tube into the Resin Tank. Make sure the distribution tube is seated correctly in the bottom of the tank. There’s usually a dimple that holds the tube in the center at the bottom of the tank.
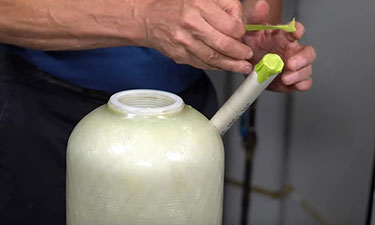
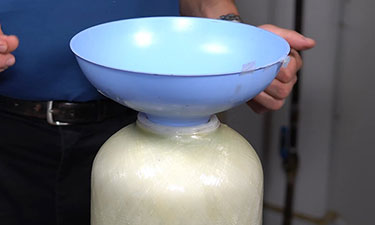
STEP 3.) Set the large funnel on top of the tank. Scoop in the resin while making sure the Distribution Tube remains centered. After filling the tank with Resin, peel the tape off the tube. Careful, don’t pull the tube up while doing that.
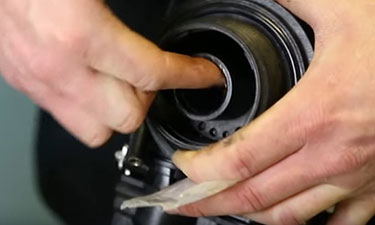
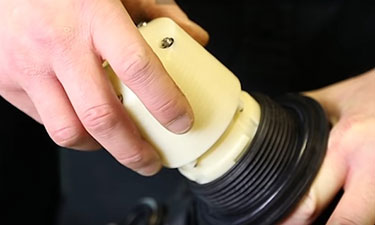
STEP 4.) Lubricate the O-Ring at the bottom of the Control Valve with Silicone. Also, lube the outer O-Ring that seals the Control Valve to the Tank.
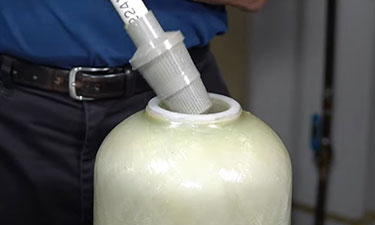
STEP 5.) Carefully insert the Upper Basket into the bottom of the Control Valve. Twist it until it locks into place.
STEP 6.) Now slide the Control Valve assembly down onto the Distributor Tube in the tank. Turn the Control Head clockwise to thread it onto the tank until it is firmly snug.
STEP 7.) Turn off your main water valve. Open a nearby faucet to drain your plumbing of water.
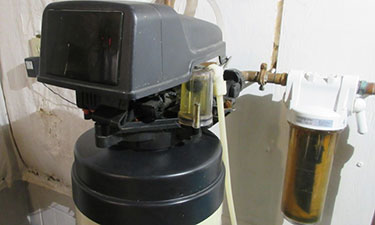
STEP 8.) Position your New Water softener and Brine Tank in their permanent locations. You will now need to make up your inlet and outlet piping to match up with your existing plumbing.
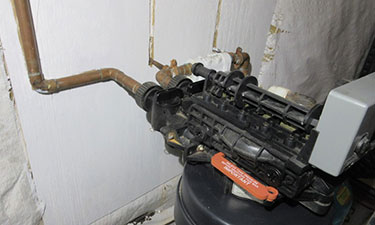
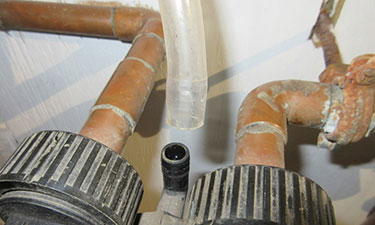
STEP 9.) Measure and piece together your copper fittings so they will match up with the existing plumbing. Cut into the your main water line and fit your made up copper assemblies. Make sure the joints in the assemblies are properly cleaned and paste flux is applied.
STEP 10.) Now the fun part. Solder all the joints you prepared in the last step. NOTE: Developments in plumbing have allowed for easy no-leak, quick-connections or , flexible PEX piping and fittings, or and the new crimped copper fittings. Connect both the inlet and the outlet sides.
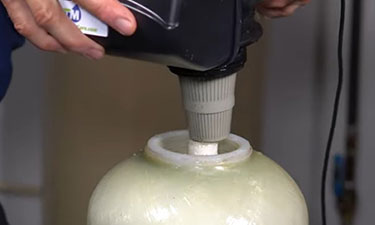
STEP 11.) Uncoil your new Brine Tubing Line. One end connects to the Control Valve and the other end to the Brine Tank. This tubing allows the for the flow of water from the Control Valve to the Brine Tank and brings salted brine water back to the Control Valve and into the Resin Tank.
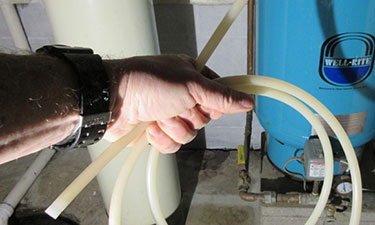
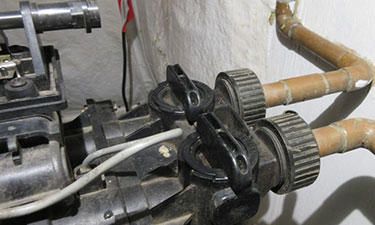
On the Softener Control Valve:
- Unscrew the Brine Nut (on Control Valve)
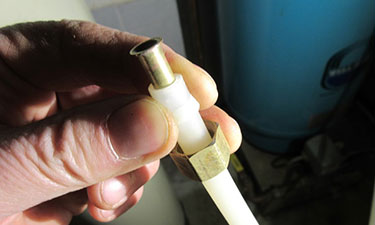
- Slip the Threaded Nut over the end of the Brine Tubing.
- Slip the Compression Nut onto the Tubing (if equipped).
- Push the flared brass Insert into the Tubing end (if supplied with the Tubing).
- Now, snug the Nut with a wrench. (Careful, not too tight).
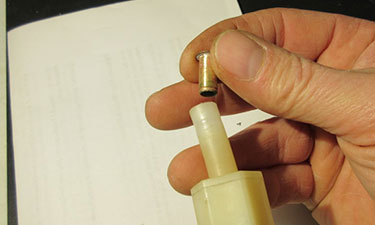
STEP 12.) Push the Tubing into the connection on the Control Valve and hand tighten the Threaded Nut. Tighten with a wrench until snug. Be careful, don’t over tighten it.
STEP 13.) Now, reposition your Brine Tank back into its permanent location. Route the Brine Tubing over to the Brine Tank so it’s neatly run. Trim off any excess tubing to make for a neat run. Slip the Threaded Nut onto the Tubing end. Slip on the Compression Nut and the flared insert, if provided.
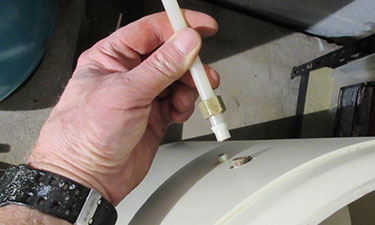
STEP 14.) Connect the Brine Tubing to the Brine Tank. Thread on the Nut by hand, then tighten with a wrench until snug. Again, don’t over tighten.
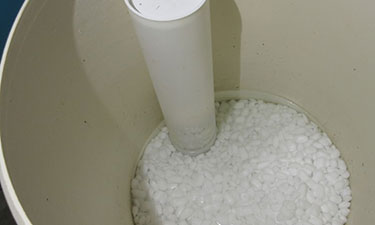
STEP 15.) Fill the Brine Tank with Softener Salt. Only fill as much as indicated inside the tank. It’ll take many weeks of use before you need to re-fill the tank. Wait until the Brine Tank is nearly empty before refilling.
STEP 16.) Insert the Drain Tubing Line into the barbed fitting at the rear of the Control Valve.
STEP 17.) Run the Drain Tubing to a nearby plumbing drain, or basement sump.

STEP 18.) Unbox the Transformer and plug into the Control Valve and a nearby electrical outlet.
STEP 19.) Go through the steps in your manual to program your new Water Softener.
Program Your Water Softener:
Now that you’ve finished the installation, let’s finish programming it to get it running. You’ll need to know the hardness of your water for this. Follow the programming instructions in your Owners manual.
STEP 20.) Program the Control Valve.
STEP 21.) With the programming complete, make sure the inlet (supply-side) of the bypass valve is open, and that the outlet-side (plumbing to the house) is closed.
STEP 22.) Set the Control Valve to “Backwash”, then slowly open the main water shutoff valve, to allow water to flow slowly into the Softener Resin Tank and into the Brine Tank.
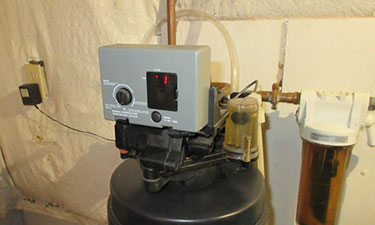
STEP 23.) Now, also slowly open the Outlet Valve on the Bypass Valve (plumbing to the house).
STEP 24.) Turn on a nearby cold water faucet to purge any trapped air in the plumbing.
Your Water Softener installation is now complete and it ready for use.
I’m sure you’d agree, it wasn’t that hard.
Congratulations, on a great job done!